The printout report has a navigator which is similar to the one of RFEM. It lists the chapters of the document. When you click an entry, the page of that chapter is displayed.
You can customize the preset chapters and their contents: Click the
![]() button on the toolbar (second from the right) to open the 'Printout Report Manager' again.
button on the toolbar (second from the right) to open the 'Printout Report Manager' again.
In the 'Report Items' area, scroll down to the 'Static Analysis Results' category. Activate the Surfaces - Basic Stresses check box, for example, to include the surface stresses of the top and bottom sides (1). Then select that report item so that the 'Options' area is displayed to the right.
In the 'Options' area, clear the Result filters from current table set option. You can thus apply specific settings for the data to be printed (2). Activate the Select loading option beneath to include the results of specific load cases or combinations only. Then select the Load Cases / Combinations tab (3).
In the 'To Select' column, double-click the ULS DS1 design situation to transfer it to the 'Selected' column (1). (Alternatively, select it and click the
![]() button.) Next click the To Display tab (2).
button.) Next click the To Display tab (2).
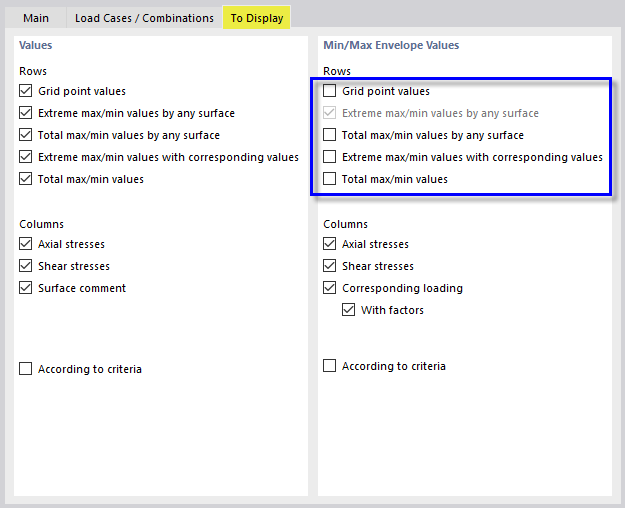
Clear all check boxes except for the Extreme max/min values by any surface option. Then click Save and Show again.
The printout report now includes the maximum and minimum values of every surface. Those values refer to the grid points (see the Basic Stresses of Surfaces image).


