The frame girder is to be connected to the columns by bending resistant end plates. Furthermore, the outer beams – members nos. 5 and 6 – are to be fixed to the columns by fin plates.
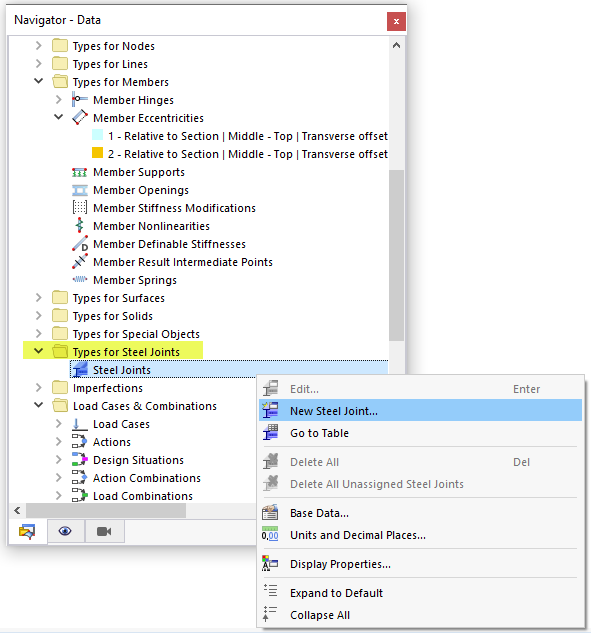
To define a new steel joint, open the Types for Steel Joints category in the 'Navigator - Data'. Then right-click the Steel Joints item. In the shortcut menu, select New Steel Joint.
In the 'New Steel Joint' dialog box, the default configuration is set for the Strength design. If no stiffness analysis configuration is preset, select the 1- Initial Stiffness | No interaction item in the 'Additional Analysis' area so that the connection will be classified.
To specify the relevant nodes of the connection graphically, click the
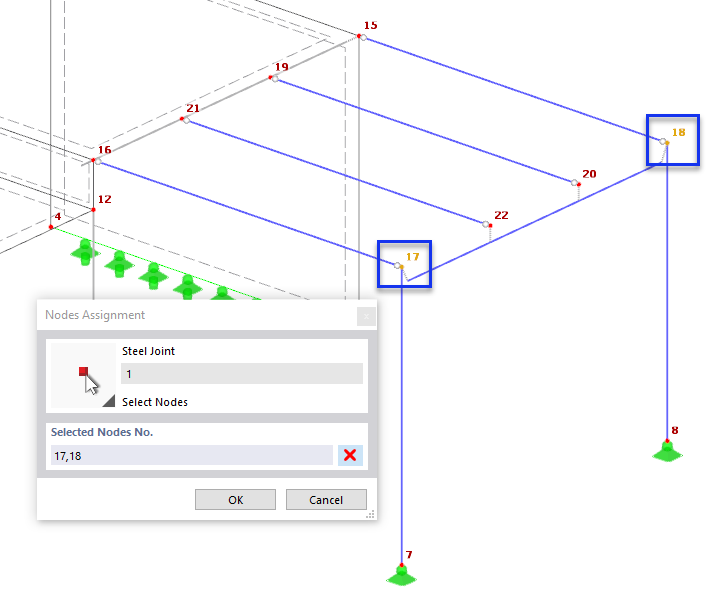
![]() button in the 'Assigned to Nodes No.' area. Then select the two corner nodes nos. 16 and 17 by clicking them one by one in the work window.
button in the 'Assigned to Nodes No.' area. Then select the two corner nodes nos. 16 and 17 by clicking them one by one in the work window.
Click OK to return to the dialog box where the node numbers are set now. In the 'Assignment of Members' are, the program created three "Members". They represent member types for the design that are based on the topology of the selected nodes.
Members with identical properties and similar positions in the model are grouped together.
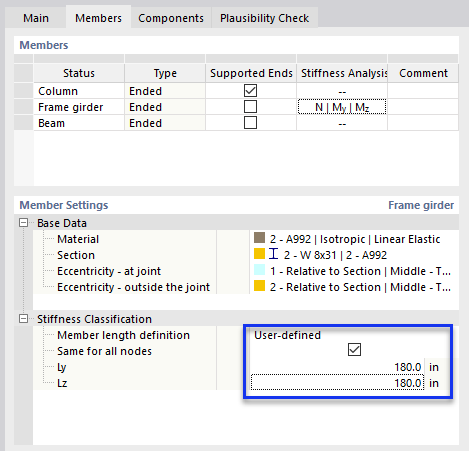
Go to the Members tab. By selecting a member type in the 'Status' column, you can check its location within the model view to the right. You can rename the member types for a better overview: Replace 'Member 1' by Column, 'Member 2' by Frame girder, and 'Member 3' by Grid girder.
One of the members meeting in the node must be with supported ends. Otherwise the Substitute Steel Joint FE Model cannot be designed. The nodal support of the column is automatically detected and preset for that member.
To classify the joint of the frame girder, select the box in the second line of the 'Stiffness Analysis' column. Open the list and then select all internal forces (N, My, Mz) for the analysis.
Additionally, the length of the frame girder must be adjusted for the stiffness analysis (the continuous member was divided to apply connections for the beams, see Chapter Adjusting the Model ). Make sure that the second line still selected in the 'Members' area. Then click the From global model box in the 'Stiffness Classification' area. Open the list where you select the User-defined option.
Select the Same for all nodes option next. Finally enter the frame girder length of 180 in for the Ly and Lz parameters each.
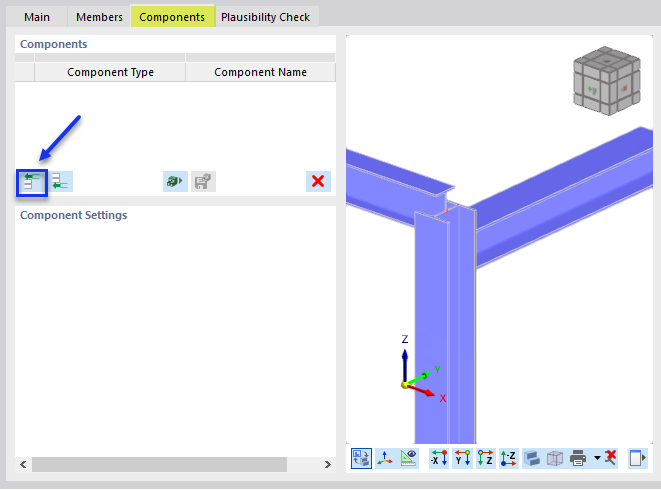
Now you can start defining the components of the connection. To do this, switch to the Components tab.
End Plate (Frame Girder to Column)
The list of components is still empty. To create the end plate component for the frame girder, click the
![]() button in the 'Components' area.
button in the 'Components' area.
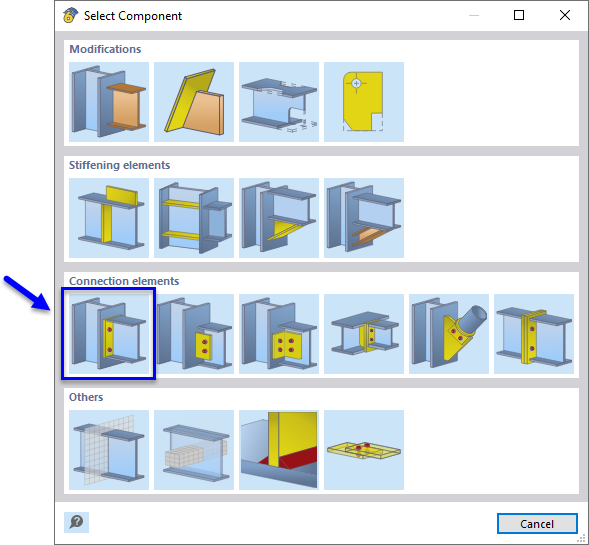
In the 'Select Component' window, select the End Plate component type by clicking it.
You return to the 'Components' tab where the end plate is set as new component type.
In the 'Component Settings' area, select the Frame girder as 'Connected member 1' in the list (1). As 'Reference member', select the Column (2).
Furthermore, set the following parameters to define the end plate.
Plate
| Material | 2 - A992 |
| Thickness | 0.625 in |
| Left offset | 0 in |
| Right offset | 0 in |
Bolts
| Diameter | 5/8" |
| Grade | A325 |
| Spacing horizontally | 2.0 4.0 2.0 in (separate values with blanks) |
| Number vertically | 2 |
| Spacing vertically | 2.5 3.75 2.5 in |
| Pretensioned bolts | Enabled |
| Shear plane in thread | Disabled |
Welds
The throat thickness (instead of leg size) should be entered for the weld size. As an example, 3/8 in weld is entered as 0.375 in* 0.707 = 0.265 in. In the future, the input will be changed to leg size to follow US customary.
| Flange 1 | 0.265 in |
| Web | 0.177 in |
| Flange 2 | 0.265 in |
The component settings should then look like in the following image.
Member Cut and Fin Plate (Grid Girder to Column)
The next component to be defined connects the beam to the column by a fin plate. For this, the column must be extended to the upper edge of the grid girder by means of the "member cut" component. Then the "fin plate" component can be applied.
Instead of defining the two components separately, it is more convenient to use one of the templates in the library of components. Click the
![]() button in the 'Components' area to open that library.
button in the 'Components' area to open that library.
In the 'Select Steel Joints Template' window, select the category of pinned connections by clicking the big
![]() button (1). Then set the Beam to Column subcategory (2). Finally select the Fin Plate template (3).
button (1). Then set the Beam to Column subcategory (2). Finally select the Fin Plate template (3).
Click Apply Template (4).
The program applies the template to the model and fills in the members and materials in the 'Assignment' area. It is required to adjust that assignment manually, however: For the 'Column' member, select the Column item from the list (1). Then set the Beam for the 'Beam' member (2).
When you have clicked OK (3), two new component types are included in the list of components: 'Member Cut' and 'Fin Plate'.
If you deactivate the 'Member Cut' component by clearing its check box, you will see in the preview how the column has been adjusted. Activate the check box again, however, so that the component is applied to the connection!
Select the Fin Plate component by clicking the third line in the 'Components' area.
Plate
| Thickness | 0.375 in |
| Top offset | -2.0 in |
| Bottom offset | -2.14 in |
Bolts
| Diameter | 1/2” |
| Grade | A325 |
| Spacing horizontally | 1.5 1.875 in (separate values with blanks) |
| Spacing vertically | 1.0 2.0 1.0 in |
| Shear plane in thread | Disabled |
Welds
As previously mentioned, the throat thickness (instead of leg size) should be entered for the weld size. As an example, 3/16 in weld is entered as 0.1875 in* 0.707 = 0.133 in.
The component settings should then look like in the following image.
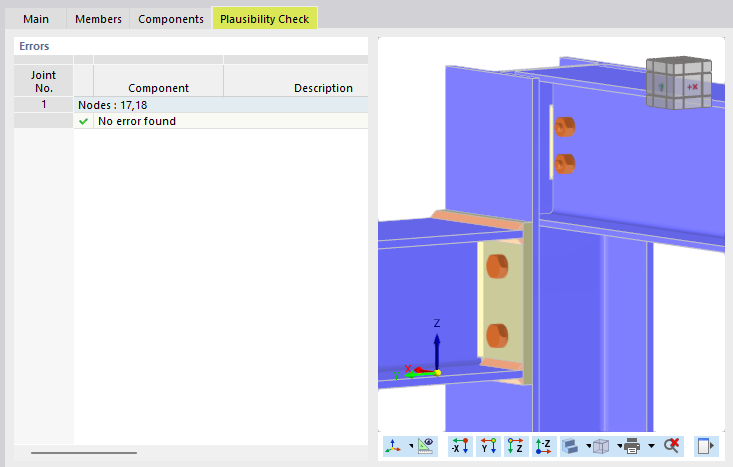
Switch to the Plausibility Check tab. The connection is correctly defined as no errors are detected by the program.
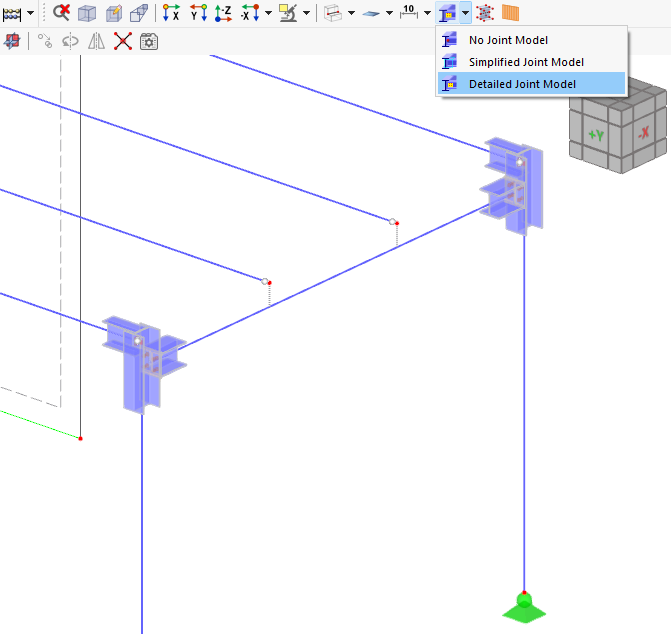
Click OK to close the dialog box. In the work window, the connection is displayed at the two corner nodes as a simplified model. When you select the Detailed Joint Model from the
![]() list box on the toolbar, you can activate the 3D view of the components.
list box on the toolbar, you can activate the 3D view of the components.
