在 RSECTION 中提供以下分析方法: thin-walled analysis and finite element analysis. You can select the preferred method in the model’s Base Data, as shown in Image 1. The difference between these two methods is the way the properties and stresses for the gross cross-section are calculated. In the former, the section properties are calculated analytically for both gross and effective cross-sections.
With the Finite Elements Analysis, on the other hand, the section properties of the gross cross-section are calculated with finite elements based on defined parts, whereas for the effective cross-section, the calculation is analytical. Hence, the effective cross-section can be calculated for both analysis methods if the license for the extension Effective Section is available, as shown in Image 1.
Considering that the section of interest has already been created in the program and the relevant analysis method has been selected in the Base Data as in Image 1, the next step is to define a load case in which the internal forces from a certain action will be stored.
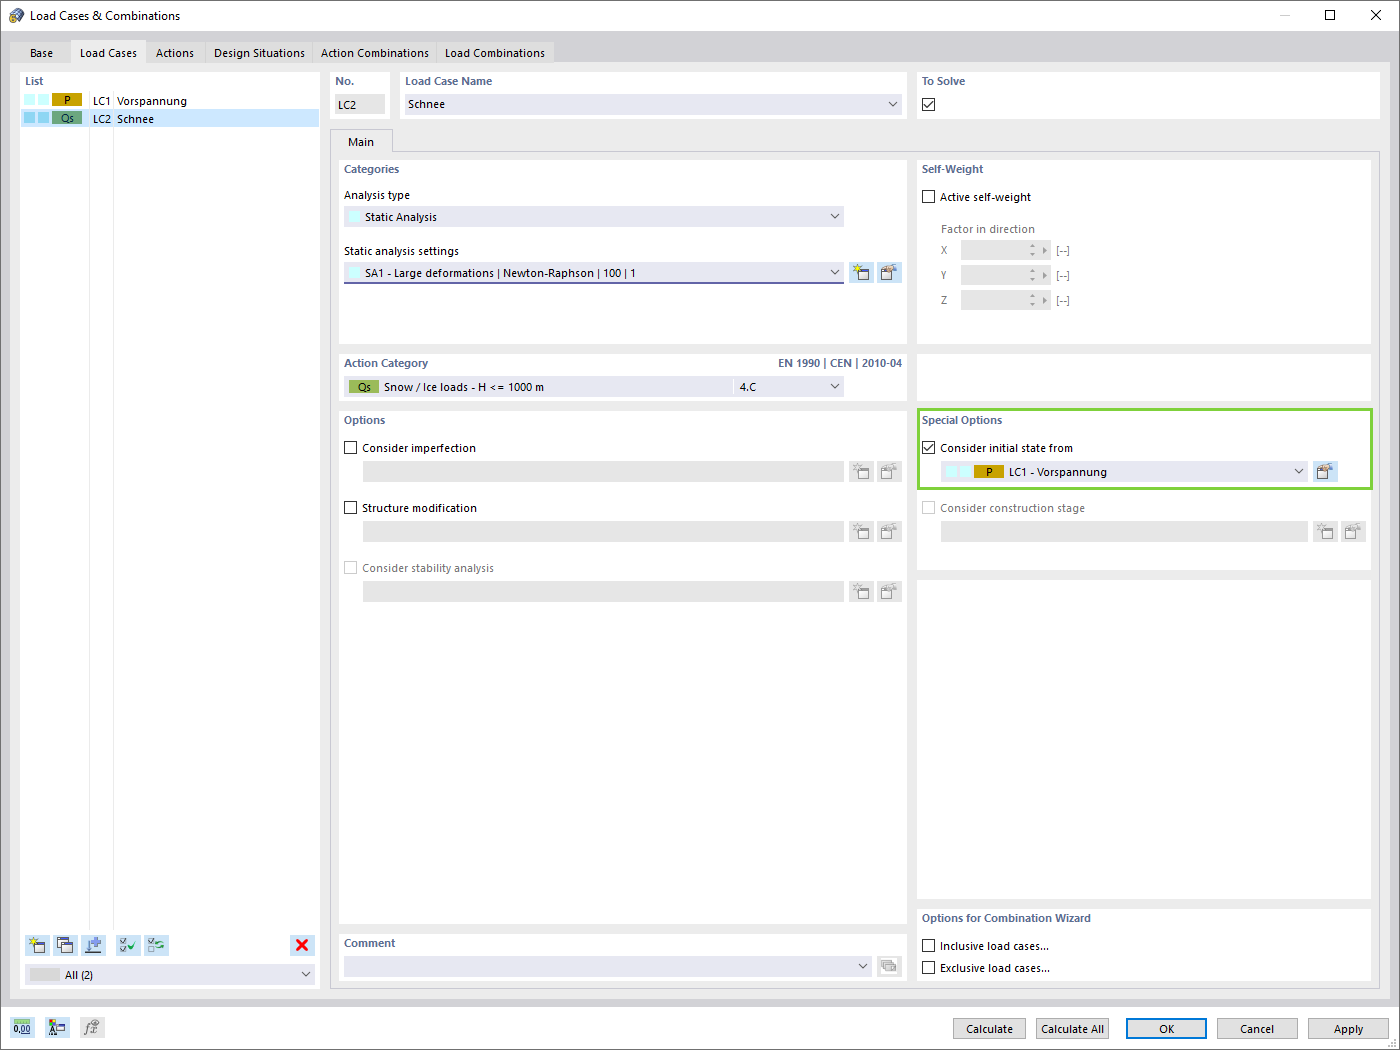
You can do this as shown in Image 2, where you are asked to choose the action category and select/deselect the "To Solve" check box, which controls whether the load case is analyzed in the calculation. You can create, copy, or delete load cases directly in the load cases list, which contains all load cases of the model.
Once the load cases are created, you can define the internal forces. You can do this both in the Load Cases & Combinations window and the Internal Forces table, as shown in Image 3. The model can be designed for any load case using several internal forces present at individual locations x along the member.
If there are different combinations of internal forces, you can use them individually in different load cases, as well as on different members or at different x locations in the same load case. Thus, you can assign axial and shear forces, torsional and bending moment, and bimoment (Image 3).
As an alternative to this option of defining the internal forces manually, you can import internal forces from RSTAB or RFEM, as shown in Image 4. To do so, you have to define the model from which the internal forces are to be imported by selecting the model from Dlubal Center or via the Windows dialog box called "Open". For you to be able to import the internal forces, the associated RFEM 6 or RSTAB 9 file must be saved with the results beforehand.
In the "Object Type" list box, you can define whether you want to import the internal forces of cross-sections or members, and select the cross-section or the member whose internal forces are to be considered. You can select the load cases/load combinations to be transferred from the model, but you can only import internal forces of calculated load cases/load combinations (load cases/load combinations that have not been calculated are highlighted in gray). In RSECTION, one load case is created for each imported load case and load combination; thus, if a load case already exists, you can specify whether to overwrite it or to create another load case.
Next, you can define the stresses to be calculated and displayed. You can do this in the Stress Configuration window where a list of stresses is available and you can select the corresponding check box of the stress to be calculated. A description of the selected stress is also available, as shown in Image 5. For each stress, you can select a limit stress type in the table so that the stress ratio is calculated from the ratio of the existing stress to the limit stress.
The limit normal stress determined as σx,max = fy represents the allowable stress for the loading due to bending and axial force, whereas the limit shear stress indicates the allowable shear stress due to shear and torsion and it is calculated as τmax = fy/√3 (with fy being the yield strength). The limit equivalent stress, on the other hand, represents the allowable equivalent stress for the simultaneous effect of several stresses, and it is determined as σv = fy. You also can use the limit stress type "User" to adjust the limit stress manually, or you select the limit stress type "None" and the calculation of the stress ratio will be omitted.
You can now start the calculation and obtain the results as shown in Image 6. The stresses that were selected in the Stress Configuration are calculated from the defined internal forces and are available in the Navigator’s Results. You can find the section properties in the Section Properties table as well. All available results can be further documented in a printout report (Image 7).
Final Remarks
You can use the RSECTION stand-alone program to calculate all relevant cross-section properties, including the plastic limit internal forces. For sections consisting of different materials, the program determines the ideal cross-section properties. You can choose between two analysis methods: thin-walled analysis and finite-element analysis. The difference between them is the way the properties and stresses on the gross cross-section are calculated.
Nevertheless, the workflow you must follow is to define load cases in which internal forces from a certain action will be stored, and select the stresses to be calculated and displayed. Hence, you can calculate the stresses from axial force, biaxial bending moments and shear forces, primary and secondary torsional moment, and warping moment for any cross-section shape. This workflow will be shown in more detail in an upcoming Knowledge Base article.