To add an image to the printout report, minimize the preview window by clicking the
![]() button on the 'Printout Report' title bar. The RFEM workspace is displayed again in full view.
button on the 'Printout Report' title bar. The RFEM workspace is displayed again in full view.
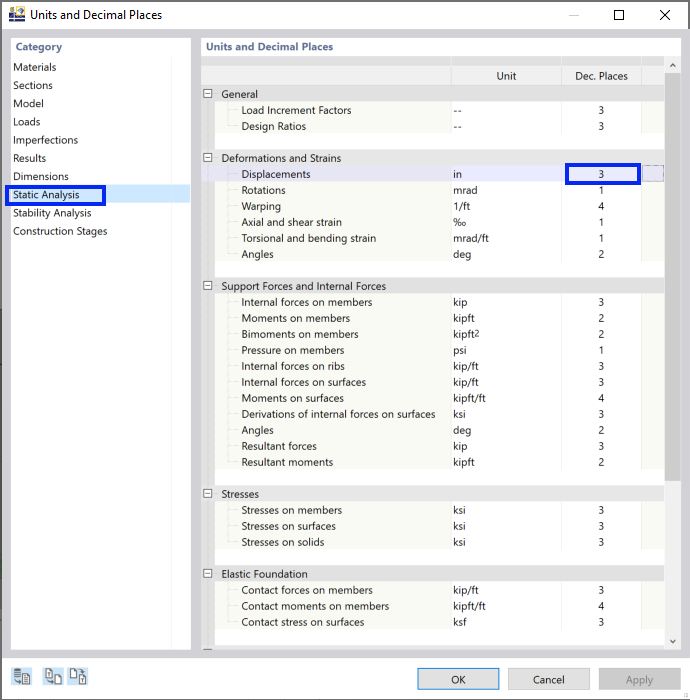
In the Options menu, select Units and Decimal Places. Then select the Static Analysis category. In the 'Displacements and Strains' section, change the decimal places of the Displacements from 2 to 3. Then click OK.
Set the CO3 combination on the toolbar so that the results due to the live loads on the slabs are shown (1). In the 'Navigator - Results', select the Global Deformations category (2). Clear the Result Sections check box to hide the graphs of the section (3). Finally, clear the Values on Surfaces option in the upper part of the navigator (4).
To print this image to the printout report, click the
![]() button next to the
button next to the
![]() button on the toolbar. A list of printing options is opened. Click Print Graphics to Printout Report.
button on the toolbar. A list of printing options is opened. Click Print Graphics to Printout Report.
The preview of the image is presented. There are also some options to adjust its final layout.
In the 'Graphic Pictures' area, select the Window filling arrangement. Then click Save and Show.
The printout report is created again, with the image on the last page.


